
There has never been a better time to take home repairs into your own hands. With online tutorials, affordable tools, and a wealth of materials knowledge freely available, the modern homeowner can fix, improve, and maintain their home to a professional standard — and save significant money in the process. According to home improvement industry research, the average homeowner who develops basic DIY skills saves between $1,000 and $3,000 per year in contractor costs.
This comprehensive DIY home repair tips guide covers everything from building your starter toolkit and developing the right mindset, to step-by-step instructions for the most common repairs every homeowner eventually faces. Whether you have never picked up a power drill or you are looking to expand your repair skills, this guide gives you the knowledge and confidence to get started today.

Why Every Homeowner Should Learn Basic DIY Home Repair Skills
Owning a home means accepting responsibility for its upkeep. Every house, regardless of age or build quality, requires regular maintenance and occasional repairs. Homeowners who rely entirely on contractors for every small task face two major disadvantages: high costs and long waiting times. Learning even a handful of basic DIY home repair skills transforms this situation entirely.
- Save hundreds to thousands of dollars annually: Labour costs are the largest component of most home repair bills. Doing the work yourself eliminates this entirely.
- Respond to problems immediately: A leaking tap or a broken door latch can be fixed the same day rather than waiting days or weeks for a contractor.
- Understand your own home better: DIY work builds intimate knowledge of your home’s systems — plumbing, electrical, structural — making you better at spotting problems early.
- Increase your home’s value: Well-maintained and improved homes command higher sale prices. Many buyers specifically look for homes that show evidence of careful upkeep.
- Build genuine self-sufficiency: The confidence that comes from successfully completing home repairs is deeply satisfying and compounds over time.
The Essential DIY Home Repair Toolkit: What You Actually Need
One of the biggest barriers to starting DIY home repairs is not knowing what tools to buy. Many beginners either buy too little and cannot complete jobs, or spend hundreds on tools they never use. Here is the definitive starter toolkit — organised by priority — that covers the vast majority of common home repairs.
| Tool | Approx. Cost | Why You Need It |
| Cordless drill / driver | $40–$120 | Screws, wall fixings, assembly — the single most useful DIY tool |
| Claw hammer | $10–$25 | Nails, demolition, light framing work |
| Tape measure (5m/16ft) | $5–$15 | Accurate measuring for almost every task |
| Spirit level (60cm) | $10–$30 | Shelves, tiles, pictures — anything that must be straight |
| Set of screwdrivers (flat & Phillips) | $8–$20 | Switches, fixtures, furniture, appliances |
| Adjustable spanner / wrench | $8–$20 | Taps, pipes, bolts of all sizes |
| Utility knife | $5–$12 | Cutting drywall, carpet, tape, and materials |
| Putty knife / filling knife | $5–$15 | Filling holes and cracks in walls |
| Hand saw | $15–$35 | Cutting timber, trim, and shelving |
| Plunger | $5–$15 | Blocked drains and toilets |
| Stud finder | $15–$40 | Locating wall studs before drilling or fixing |
| Caulking gun | $8–$18 | Sealing bathrooms, windows, and door frames |
| Sandpaper set (multi-grit) | $5–$12 | Smoothing surfaces before painting or finishing |
| Torch / headlamp | $8–$25 | Under sinks, in roof spaces, fuse boxes |
💡 PRO TIP: Buy quality for tools you will use constantly (drill, hammer, tape measure) and budget options for tools you will rarely use. A good cordless drill makes every project easier — it is always worth the investment.
DIY Safety Rules: The Golden Principles Before You Start Any Repair
Every experienced DIYer will tell you the same thing: safety is not optional. Home repairs involve electricity, sharp tools, heights, heavy materials, and chemical products. Respecting these hazards is not timidity — it is professionalism. Before picking up any tool, read and follow these non-negotiable safety principles.
- Always isolate electricity before working near wires: Turn off the relevant circuit breaker and use a voltage tester to confirm the circuit is dead before touching any wiring.
- Turn off water before any plumbing work: Locate your stopcock and close it before touching any pipe, tap, or water-related fitting.
- Wear appropriate personal protective equipment: Safety glasses for drilling and cutting, dust masks for sanding, gloves when handling chemicals or sharp materials.
- Never work on a ladder alone for heights above 3 metres: Have someone steady the base and always maintain three points of contact on the ladder.
- Read product labels completely: Paints, adhesives, sealants, and chemical cleaners all carry specific safety and application instructions.
- Know when to stop and call a professional: Structural damage, gas lines, main electrical panels, and asbestos-containing materials are never DIY territory.
⚠️ SAFETY FIRST: If your home was built before 1980, materials like floor tiles, textured ceiling paint (popcorn ceiling), and pipe insulation may contain asbestos. Never sand, drill, or disturb these materials. Always have them professionally tested before any renovation work.

DIY Tip 1: Patching and Repairing Walls Like a Professional
Wall damage — holes, cracks, dents, and scuffs — is one of the most common household repair needs and one of the most satisfying to fix yourself. With the right technique, a patched wall is completely invisible after repainting.
Filling Small Holes (Nail/Screw Holes, Dents up to 2cm)
- Clean the hole: Remove any loose debris or protruding material with a putty knife or sandpaper.
- Apply ready-mixed filler: Press filler into the hole slightly proud of the wall surface using a putty knife.
- Allow to dry fully: Most fillers take 1–4 hours. Do not rush this step.
- Sand smooth: Use fine-grit sandpaper (120 or 180 grit) to sand the area level with the surrounding wall.
- Prime and paint: Apply a small amount of primer before painting to prevent the filler showing through as a dull patch.
Repairing Larger Holes (5cm–30cm in Drywall)
- Cut a clean square or rectangle: Use a utility knife and a straight edge to cut a tidy shape around the damaged area.
- Create a backing support: Insert a piece of timber or a proprietary drywall repair clip behind the hole to support the patch.
- Cut a drywall patch: Cut a piece of new drywall to fit the hole exactly.
- Screw the patch in place: Use drywall screws to fix the patch to the backing support.
- Apply joint tape and compound: Cover seams with paper tape and drywall compound. Apply 2–3 thin coats, feathering the edges each time.
- Sand, prime, and paint: Sand smooth when fully dry and finish as above.
💡 PRO TIP: Match your filler to the task: flexible acrylic filler for hairline cracks near skirting boards and window frames; rigid ready-mixed filler for holes in flat wall surfaces. Using the wrong type leads to cracking.
💰 COST SAVING: A basic wall patching kit (filler, sandpaper, small roller) costs $15–$25. A plasterer would charge $80–$250 for the same job. DIY wall patching is one of the highest-return skills you can develop.
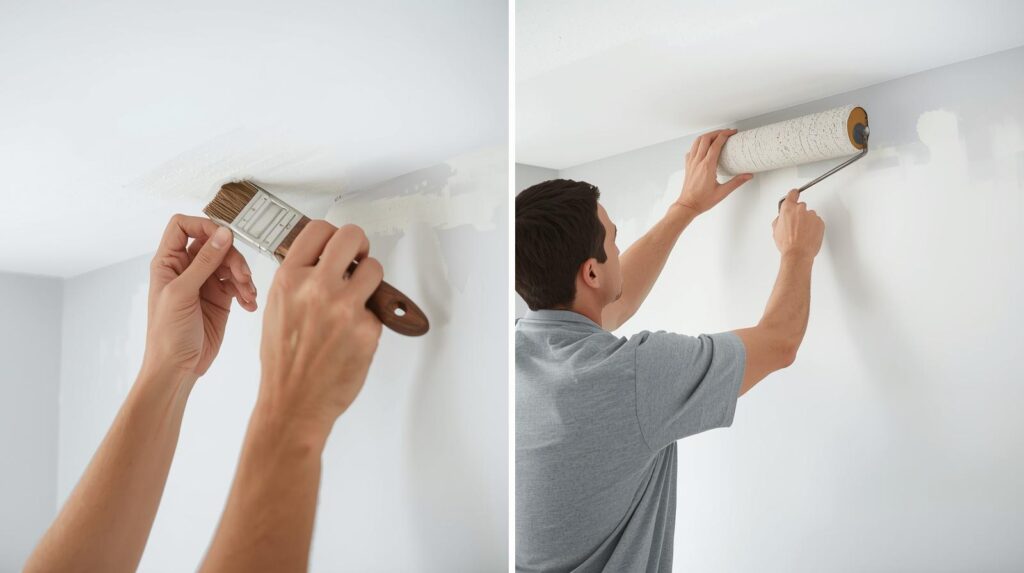
DIY Tip 2: Painting Walls and Ceilings to a Professional Standard
Painting is the single most transformative DIY task in any home. A freshly painted room looks cleaner, larger, and more modern — and the skill gap between a professional painter and a careful DIYer is smaller than most people think. The secret is almost entirely in the preparation.
- Prepare the room thoroughly: Move furniture, lay dust sheets on floors, and use masking tape along skirting boards, door frames, and ceiling edges.
- Fill and sand all imperfections first: Paint magnifies every crack, hole, and bump. Fix walls before opening the tin.
- Always use primer on new plaster or repaired areas: Primer seals porous surfaces and prevents uneven absorption that causes patchy results.
- Cut in before rolling: Use a 50mm brush to paint a 5–8cm band along all edges and corners before using a roller on the main wall area.
- Roll in a W or M pattern: Start with a W shape, then fill in without lifting the roller. This avoids visible roller lines.
- Apply two thin coats: Always better than one thick coat. Allow full drying time between coats as specified on the paint tin.
- Sand lightly between coats: A very light sand with fine paper between coats produces a noticeably smoother finish.
💡 PRO TIP: Buy a quality roller and brush — cheap ones shed fibres into the paint and leave a rough finish. A good 9-inch roller sleeve and a quality 50mm brush cost around $15 combined and make an enormous difference to results.
DIY Tip 3: Basic Plumbing Repairs Any Homeowner Can Handle
Many common plumbing issues are genuinely fixable without a licensed plumber, saving you $70–$200 per call-out. The key is knowing which tasks are safe to DIY and which must be left to professionals.
Fix a Dripping Tap
- Turn off the isolation valve: Found under the sink or near the tap — turn clockwise to close.
- Disassemble the tap head: Remove the decorative cap, unscrew the handle, and lift out the headgear assembly.
- Replace the washer or ceramic cartridge: Take the old part to a hardware store to match it exactly.
- Reassemble and test: Tighten everything firmly (not overtly tight) and turn water back on slowly.
Unblock a Drain
- Start with boiling water: Pour slowly — enough to melt grease and soap build-up.
- Try baking soda and white vinegar: Pour down drain, wait 15 minutes, flush with hot water.
- Use a plunger: Create a firm seal and plunge firmly 10–15 times.
- Try a drain snake: Insert and rotate to break up hair and debris deeper in the pipe.
⚠️ SAFETY FIRST: Never attempt DIY work on gas lines, main electrical panels, or pipes buried inside structural walls. These require licensed professionals by law in most jurisdictions, and mistakes can be life-threatening.
DIY Tip 4: Fixing Floors — Creaks, Scratches, and Damaged Boards
Floor repairs are among the most impactful DIY improvements you can make. Creaking floorboards, scratched timber, and lifting vinyl can all be addressed without professional help.
Silencing Creaky Floorboards
- Talcum powder method: Sprinkle talcum powder into the gaps between squeaky boards and work it in by walking over the area. Effective for mild squeaks.
- Screw from above: Locate the floor joist (use a stud finder or the nail pattern as a guide) and drive a coarse-thread screw through the board into the joist. Fill the screw head with colour-matched wood filler.
- Screw from below: If you have basement or underfloor access, have someone stand on the squeaky spot while you drive a short screw up from below — stop before it breaks through the surface.
Repairing Scratched Timber Floors
- Minor scratches: Use a wood repair marker or crayon in a matching colour. Buff gently with a soft cloth.
- Deeper scratches: Fill with a colour-matched wood filler, allow to dry, sand level, and apply a matching floor finish.
- Worn finish (no deep scratches): Light sand with fine-grit paper to remove the old finish, clean thoroughly, and apply fresh floor varnish or oil in the direction of the grain.
💰 COST SAVING: Floor sanding and refinishing by a professional typically costs $3–$8 per square foot. DIY refinishing a single room costs $30–$80 in materials. The saving on a medium-sized room can easily be $300–$600.
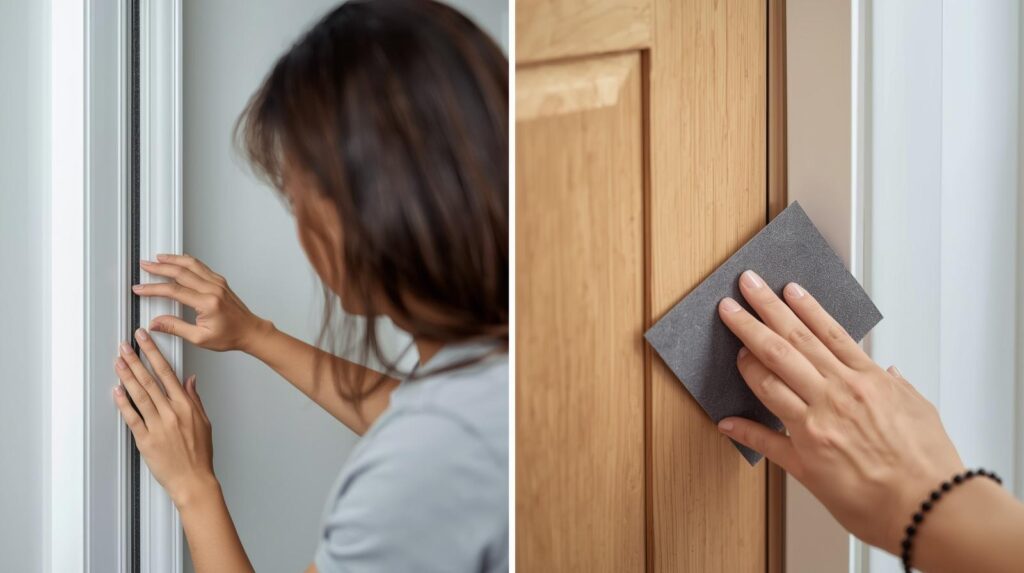
DIY Tip 5: Doors, Windows, and Draught-Proofing
Sticking doors, squeaky hinges, loose door handles, and drafty windows are daily irritants that are almost always easy and inexpensive to fix.
- Squeaky door hinges: Apply WD-40, 3-in-1 oil, or petroleum jelly to the hinge pin. Open and close the door several times to work the lubricant in fully.
- Door sticking on the frame: Identify the contact point (look for paint wear or marks). Sand or plane the edge lightly until the door closes freely.
- Loose door handle or knob: Tighten the grub screw on the handle rose with an Allen key, or replace the worn spindle bar if the handle spins without engaging.
- Draughty door bottoms: Fit a self-adhesive door brush strip or a drop-down excluder to seal the gap between the door and the floor.
- Draughty window frames: Apply self-adhesive foam seal strip around the window frame rebate. Replace every 3–5 years as foam compresses over time.
- Rattling single-pane windows: Apply a thin bead of silicone sealant around loose panes, or fit small rubber glazing packers into the frame rebate to stop rattling.
💡 PRO TIP: Check all exterior door and window seals at the start of each autumn. Renewing draught seals before winter arrives is the simplest and cheapest way to reduce heating costs — materials for a full house cost $30–$60.
DIY Tip 6: Re-Caulking Bathrooms and Replacing Damaged Tiles
Old, discoloured, or mouldy sealant around baths, showers, and basins is one of the first things people notice in a bathroom — and one of the quickest wins in DIY home improvement. Re-caulking takes about an hour and transforms the look of a bathroom instantly.
How to Re-Caulk a Bath or Shower
- Remove all old sealant: Use a sealant remover tool or craft knife to cut and peel away every trace of old caulk. Clean any mould residue with a fungicidal spray.
- Clean and dry the joint completely: Any moisture or residue will prevent the new sealant from bonding. Use isopropyl alcohol for a final clean.
- Apply masking tape either side of the joint: This creates perfectly straight sealant lines and protects the tiles and bath surface.
- Apply the new silicone sealant: Use a caulking gun at a 45-degree angle, maintaining steady pressure for a continuous bead.
- Smooth with a wet finger: Dip your finger in water and run it firmly along the sealant to create a smooth, slightly concave profile.
- Remove the tape and leave to cure: Pull tape away immediately while the sealant is still wet. Do not use the bath or shower for 24 hours.
💰 COST SAVING: A plumber or tiler charges $80–$200 to re-caulk a bath. A tube of quality sanitary silicone costs $6–$12. This is one of the best-value DIY jobs in the entire home.
10 DIY Home Repair Mistakes to Avoid at All Costs
Even experienced DIYers make avoidable mistakes. These ten errors are the most common — and the most costly. Awareness of them before you start is the best way to ensure your repairs go smoothly.
- Skipping preparation: Rushing to paint over unrepaired surfaces, or fitting before measuring properly, always produces worse results. Preparation is 50% of every job.
- Using the wrong products: Interior paint outside, standard sealant in wet areas, or the wrong filler for the surface type — always read labels and product specifications.
- Overtightening fixings: Over-torqued screws strip their threads in timber, crack tiles, and damage plastic fittings. Firm, not fierce.
- Drilling without checking for pipes and cables: Always use a pipe and cable detector before drilling into any wall. Hitting a water pipe or electrical cable is dangerous and expensive.
- Painting in poor conditions: Painting in cold, damp, or direct sunlight causes adhesion failure. Most paints require 10–25°C and dry conditions.
- Ignoring manufacturer’s drying times: Applying a second coat too early, or grouting before tile adhesive has set, causes the entire job to fail.
- Underestimating the job: Many DIY disasters start with ‘this will only take an hour.’ Build realistic time estimates and add 50% for complexity you have not encountered yet.
- Not having the right tools: Attempting a job without the correct tool leads to bodged results and sometimes injury. Borrow or rent tools you do not own rather than improvising.
- Failing to protect surrounding areas: Dust sheets, masking tape, and plastic sheeting are not optional extras. They prevent expensive collateral damage.
- Not knowing when to stop: If a job reveals structural damage, black mould behind walls, or asbestos materials, stop work immediately and seek professional advice.
💡 PRO TIP: Before starting any significant repair, search for a YouTube tutorial of the specific job first. Seeing the task completed correctly by someone experienced is worth 10 minutes of your time and significantly reduces mistakes.
Quick Reference: DIY vs Hire a Professional
Knowing which jobs to attempt yourself and which to leave to professionals is a crucial skill. This table gives you a clear guide:
| Repair Task | DIY Suitable? | Est. DIY Cost | Why |
| Fill & paint wall holes | Yes ✅ | $10–$25 | Easy, low risk, high reward |
| Replace tap washer | Yes ✅ | $2–$10 | Simple with basic tools |
| Re-caulk bath/shower | Yes ✅ | $6–$15 | Inexpensive, high visual impact |
| Fix squeaky floorboard | Yes ✅ | $0–$15 | Talcum powder or one screw |
| Silence squeaky door hinge | Yes ✅ | $2–$5 | Lubrication only |
| Interior painting (1 room) | Yes ✅ | $40–$150 | Prep well and take your time |
| Unblock drain | Yes ✅ | $0–$15 | Plunger, baking soda, snake |
| Fit draught excluder strips | Yes ✅ | $10–$30 | Peel and stick — 30 minutes |
| Replace toilet flapper | Yes ✅ | $5–$15 | Simple mechanism swap |
| Hang shelves | Yes ✅ | $10–$40 | Drill, rawl plugs, level |
| Replace light fitting | With caution ⚠️ | $20–$80 | Isolate circuit first; rewiring = Pro |
| Repair leak inside wall | No ❌ | N/A | Risk of major water damage |
| Gas appliance work | No ❌ | N/A | Licensed Gas Safe engineer only |
| Main electrical panel | No ❌ | N/A | Licensed electrician only |
| Structural wall removal | No ❌ | N/A | Requires structural engineer |
| Roof repair / replacement | No ❌ | N/A | Height risk + specialist skills |
Frequently Asked Questions: DIY Home Repair Tips
Q: What is the easiest DIY home repair for a complete beginner?
A: Filling and painting small wall holes is the ideal first DIY repair. It requires only a putty knife, ready-mixed filler, sandpaper, and a small tin of paint — total cost under $20. The technique is forgiving, the results are satisfying, and it builds the confidence to take on more ambitious repairs.
Q: How do I know if a DIY repair is beyond my skill level?
A: Ask yourself three questions: Does it involve gas or main electrical wiring? Could a mistake cause flooding, structural damage, or injury? Do I lack the specific tools the job genuinely requires? If yes to any of these, hire a professional. For everything else, a YouTube tutorial and the right tools will get most homeowners through most jobs.
Q: What tools should a DIY beginner buy first?
A: A cordless drill/driver, a claw hammer, a tape measure, a set of screwdrivers, and a spirit level. These five tools handle the majority of beginner repair and improvement tasks. Add a utility knife, putty knife, and adjustable spanner and you are equipped for 80% of common home repairs.
Q: How much money can I save by doing DIY repairs at home?
A: Most homeowners who develop basic DIY skills save $500–$3,000 per year in contractor costs. Simple repairs like re-caulking ($150 saving), painting ($200–$800 saving per room), and basic plumbing fixes ($70–$200 per call-out avoided) add up very quickly. The investment in tools pays for itself within the first year for most households.
Q: Is DIY home repair always cheaper than hiring a professional?
A: Usually, but not always. When you factor in the cost of tools you will only use once, the time investment, and the risk of mistakes that require professional correction, some jobs are actually cheaper and less stressful to hire out. As a general rule: if a job is genuinely risky, requires expensive specialist tools, or needs to be legally certified (gas, main electrical), hire a professional.
Conclusion: Start Small, Build Confidence, Transform Your Home
DIY home repair is one of the most practical and rewarding skills a homeowner can develop. It saves money, builds self-reliance, and deepens your connection to the place you live. The key to success is simple: start with achievable projects, invest in a solid toolkit, prepare thoroughly before every job, and know when to call a professional.
Every expert DIYer started somewhere — filling their first hole, painting their first wall, fixing their first dripping tap. The most important step is always the first one. Pick the smallest repair on your list, gather the right tools and materials, and begin. The confidence you build from that first successful fix will carry you through every project that follows.
Your home is your biggest investment. Treat it with knowledge, care, and the right tools — and it will reward you for decades to come.
