
Air leaks through doors and windows account for up to 30% of residential heating and cooling energy loss, according to the U.S. Department of Energy. The good news is that Weatherstripping Door sealing are among the most affordable, highest-impact DIY home improvements available. A well-sealed home is more comfortable, quieter, and significantly cheaper to heat and cool. This complete weatherstripping and door sealing guide covers every type of product available, step-by-step installation instructions, cost and savings data, and how to ensure your sealing work delivers lasting results.
Why Weatherstripping and Door Sealing Matter So Much
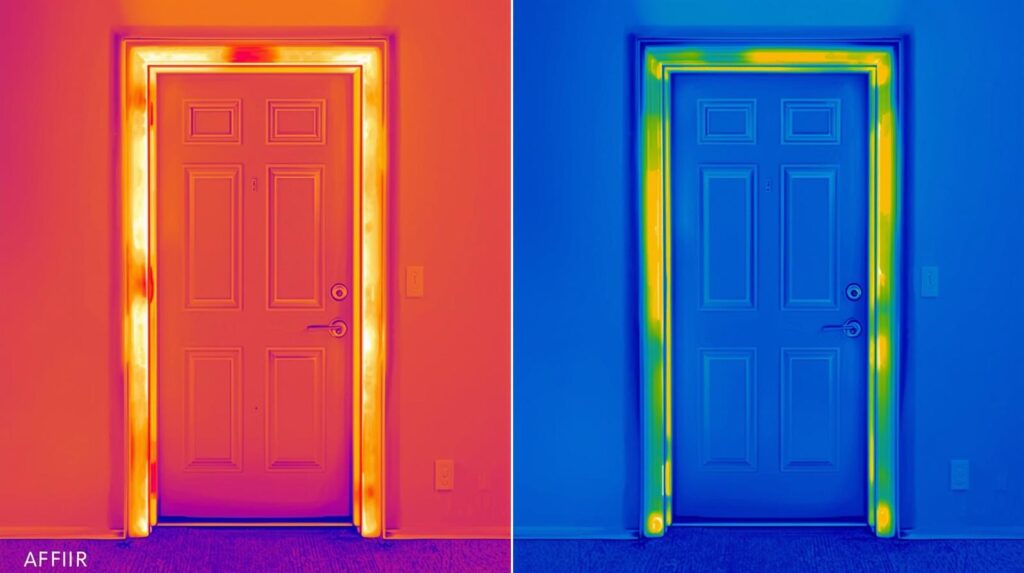
Air infiltration is the invisible enemy of home energy efficiency. Every gap around a door frame — no matter how small it looks — allows conditioned air to escape and unconditioned air to enter. On a cold winter day, those gaps make your heating system run longer. On a hot summer day, they force your air conditioner to work overtime. The cumulative effect of all those small gaps throughout a home is massive.
The average older home has enough combined air leaks to equal the energy loss of leaving a window open year round. Weatherstripping specifically addresses moving joints — the gaps around doors and operable windows that open and close. Door sweeps address the gap at the bottom of doors. Together, these simple products can reduce air infiltration by 30 to 40% around each door assembly.
Beyond energy savings, properly sealed doors dramatically improve indoor comfort by eliminating cold drafts at ankle and knee level, reduce noise infiltration from outdoors, improve indoor air quality by preventing the entry of outdoor pollutants, dust, and pollen, and can improve fire safety by slowing the spread of smoke through door gaps.
Types of Weatherstripping: Which Is Right for Your Door?
Weatherstripping comes in many materials and profiles, each suited to specific applications and usage intensities.
V-Strip (Tension Seal): A folded strip of metal or plastic in a V-shape that fits inside the door jamb and applies constant pressure against the door edge. Extremely durable and effective for the sides and top of doors. Nearly invisible when installed. Metal versions (stainless steel or bronze) last decades.
Foam Tape: The most affordable and easiest-to-install option. Adhesive-backed open or closed-cell foam compresses when the door closes. Best for irregular gaps and low-traffic doors. Closed-cell foam is more durable and water-resistant than open-cell. Typically lasts 2 to 5 years before replacement is needed.
Door Sweeps: Attached to the bottom of the door to seal the gap between the door and threshold. Available in rigid aluminum with a rubber or brush seal, or flexible vinyl. Automatic door sweeps retract when the door opens and press down when closed, providing excellent sealing without dragging on flooring.
Door Shoes and Thresholds: A door shoe wraps around the bottom edge of the door; a threshold seals the floor surface. Together they create a tight, durable seal at the base of the door. Best for exterior doors with significant gap or uneven thresholds.
Bulb Weatherstripping: A rounded foam or rubber bulb profile that compresses to fill gaps of varying sizes. Available in adhesive-backed and nail-in versions. Effective for doors with inconsistent gaps. Rubber versions outperform foam for durability and temperature resistance.
Interlocking Metal Weatherstripping: Two interlocking metal pieces installed on door and frame that create an airtight seal when the door closes. The most durable and effective option for exterior doors. Professional installation recommended for best results.

Step-by-Step Weatherstripping Installation Guide
Installing weatherstripping is a straightforward DIY project that most homeowners can complete in 1 to 3 hours per door with basic tools. Follow this process for professional results.
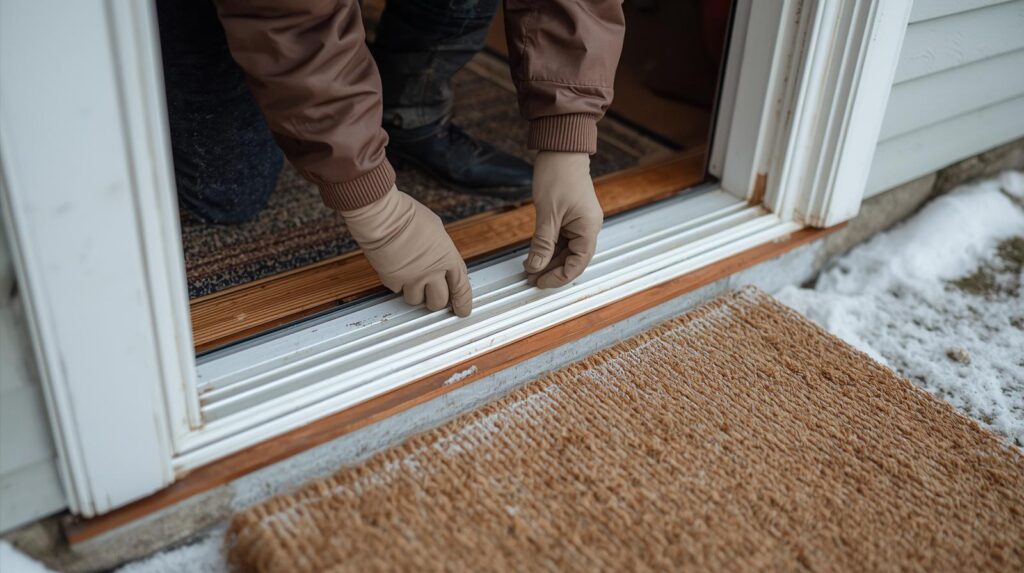
Step 1 – Assess the Door: On a sunny day, darken the room, have a helper shine a flashlight around all door edges from outside, and look for light entering around the frame. Alternatively, hold a piece of paper in the door gap — if it pulls out easily, the seal is inadequate. Note which edges have gaps and measure the gap size.
Step 2 – Remove Old Weatherstripping: Carefully remove all existing weatherstripping. Clean the surfaces thoroughly with rubbing alcohol to remove adhesive residue, dirt, and oils. Allow to dry completely before installing new products.
Step 3 – Measure and Cut: Measure each side of the door frame carefully. Cut weatherstripping slightly long (1/16 inch) for compression fit rather than leaving gaps. Use sharp scissors or a utility knife for clean cuts.
Step 4 – Install Side and Top Strips: For V-strip weatherstripping, insert into the door stop groove with the open side of the V facing the outside. For adhesive foam or bulb weatherstripping, press firmly against the door stop where the door face contacts the frame when closed.
Step 5 – Install Door Bottom Seal: For a door sweep, close the door, mark the door face 1/16 inch above the threshold, and screw the sweep to the door face so the seal just contacts the threshold. For an automatic door sweep, follow manufacturer-specific instructions.
Step 6 – Test and Adjust: Close the door and check for light, drafts, or the paper-pull test. Adjust as needed. The door should close smoothly without excessive resistance, and no light should be visible around the perimeter.
Sealing Door Frames: Caulking and Air Sealing Beyond Weatherstripping
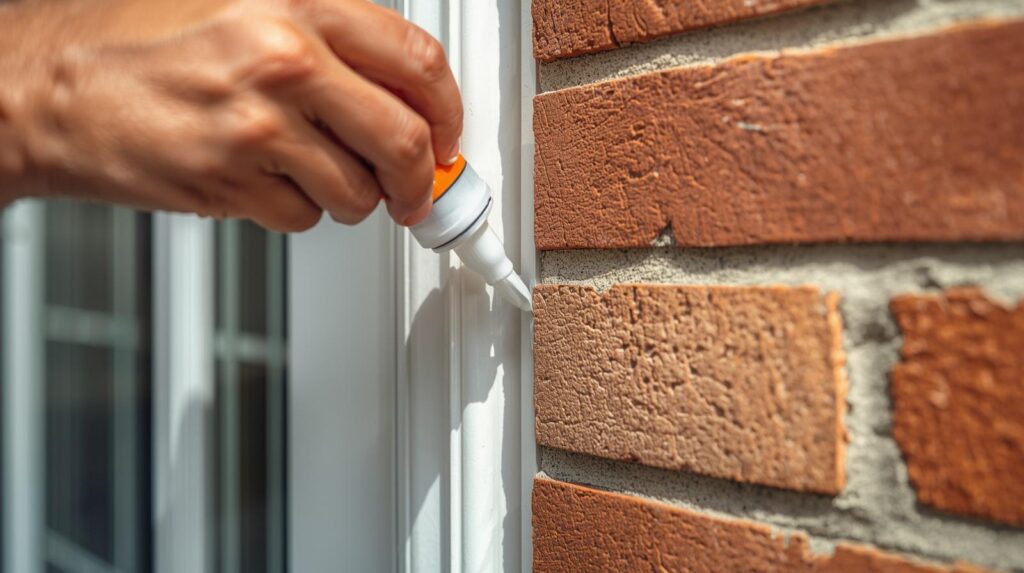
Weatherstripping addresses the gap between the moving door and its frame, but the frame itself can leak where it meets the surrounding wall. This stationary joint requires caulking rather than weatherstripping.
Inspect the exterior perimeter of each door frame where the casing meets the siding or masonry. Any gaps wider than a hairline should be sealed with paintable exterior acrylic caulk or, for larger gaps, backer rod plus caulk. On the interior, check where the door frame trim meets the drywall and caulk any gaps visible.
Don’t overlook the threshold-to-subfloor connection. Gaps in this area allow air to travel under the floor and up through the door assembly. Use expanding foam sealant in this area for a permanent, airtight seal.
For significant gaps around the door rough opening — visible when the door casing trim is removed — use low-expansion spray foam (not high-expansion, which can bow the frame) to seal completely. This is particularly important for doors adjacent to unconditioned spaces like garages or unfinished basements.
Weatherstripping Costs and Energy Savings
One of the most appealing aspects of weatherstripping and door sealing is the extremely low cost relative to the energy savings delivered.
DIY weatherstripping materials for a single exterior door typically cost $15 to $50 depending on the products selected. A full set of V-strip weatherstripping plus an automatic door sweep for a standard 3-foot exterior door runs approximately $30 to $60 in materials. For a complete home with 5 to 7 exterior doors plus weather sealing, total material costs typically run $150 to $400.
Professional weatherstripping installation for a single door costs $75 to $150 in labor, making full-home professional sealing projects run $400 to $1,200 depending on scope. Given the minimal cost and ease of DIY installation, most homeowners opt to self-install basic products.
The U.S. Department of Energy estimates that air sealing and weatherstripping reduce annual heating and cooling costs by 10 to 20% — translating to $200 to $400 in savings for the average household. With material costs under $400 for a complete home, the payback period for DIY weatherstripping can be under one year. No other home improvement project delivers a faster return on investment.
Maintenance and Long-Term Performance of Weatherstripping
Weatherstripping degrades over time from repeated door operation, UV exposure, temperature cycling, and moisture. Regular inspection and timely replacement are key to maintaining performance.
Inspect all weatherstripping and door sweeps at least once per year, ideally at the beginning of heating season. Signs of needed replacement include visible compression, cracking, tears, gaps along the contact surface, renewed drafts or light infiltration, and difficulty achieving a tight door latch.
Foam tape typically lasts 2 to 5 years. Vinyl bulb weatherstripping lasts 5 to 8 years. V-strip metal weatherstripping and quality rubber products can last 10 to 20 years with proper installation. Automatic door sweeps last 5 to 10 years depending on traffic and floor surface abrasion.
Extend weatherstripping life by keeping door frames painted and sealed to prevent wood swelling and shrinkage, lubricating door hinges and hardware to prevent slamming, and cleaning weatherstripping surfaces with a mild soap and water solution annually to remove dirt that accelerates wear.
Weatherstripping and door sealing are among the most cost-effective, high-impact home improvement projects any homeowner can undertake in 2026. With material costs under $50 per door, DIY-friendly installation, and payback periods under one year, there is no reason to delay. Start by assessing every exterior door in your home, replace any compromised weatherstripping, add quality door sweeps, and caulk the surrounding frame. The combination of improved comfort, noise reduction, and energy savings makes this one of the most satisfying weekend home improvement projects available.
